How To Make A One Tier Diaper Cake
These instructions teach you how to make a beautiful, yet easy 1-tier diaper cake. My free step by step instructions are simple and clear, so this is foolproof and everybody can do this!
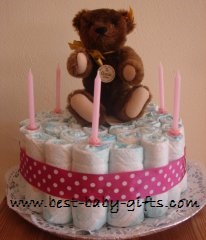
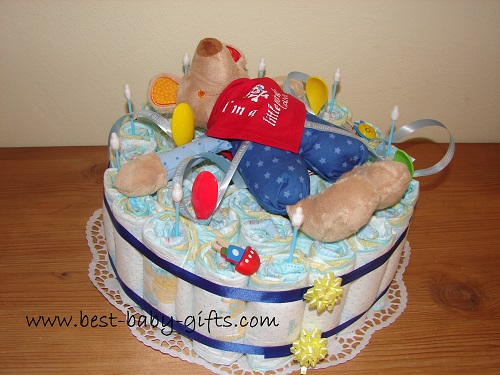
This small nappy cake can be given on its own as a little gift but it is also ideal to pimp up your baby gift. Either as an addition to your money gift, babysitting coupon or gift card or to better showcase your present, such as for example a doll or teddy bear for baby (pictured here).
One Tier Diaper Cake: What You Need
- 40 diapers - that makes 1 spare diaper, I have used Pampers in size 2 - do not use diapers in size 1, since babies outgrow size 1 in no time
- 40 small and 1 bigger rubber bands
- broad ribbon - color according to your general theme boy (blue) / girl (pink) / unisex (yellow, brown or green)
- 9 baby cotton swabs or real birthday candles
- 1 paper napkin (color should match with your ribbon) or a doll or teddy bear or something similar to place on top
- a tray and a paper lace doily, alternatively a piece of big cardboard and aluminium foil
- some string, a pair of scissors, glue, 1 cloth peg
Instructions For Your 1-Tier Diaper Cake:
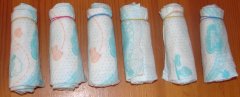
Step 1:
Roll all your diapers and fix them with a rubber band: at your own preference you can either roll them from the closed end to the open end, roll them from the open end to the closed end, or open them up and roll the entire length (that's what I did here). Roll the diapers as tight as you possibly can and then fix them with a rubber band.
Step 2:
Take one rolled up diaper as your center and position 7 more diapers around it, fix loosely with the big rubber band.
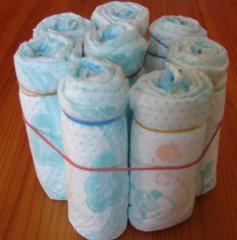
Step 3:
Place your 2nd layer around the 1st layer, inside the rubber band. The 2nd layer should be 13 diapers.
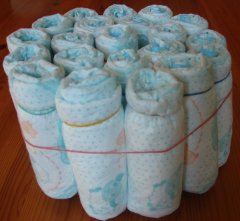
Step 4:
Place your 3rd (and outer) layer around the 2nd layer, inside the rubber band, which probably will be tight now. The 3rd layer consists of 18 diapers. Make sure the diaper openings all point towards the inner of your diaper cake.
Step 5:
Use the string to fix all the layers. Pull tight and make a knot! After that you can remove all of your rubber bands. Now your actual cake is ready!
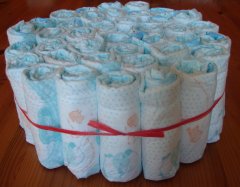
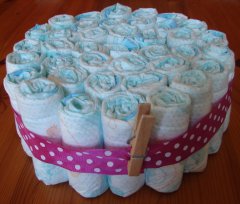
Step 6:
Take the ribbon, position it over the string and fasten it with just a drop of glue (alternatively a pin). If you use glue, take a small cloth peg to fix it until it is dry.
Step 7:
Correct any crooked diapers and position all in a nice and straight way to make the cake look perfect.
Step 8:
Stick the cotton swabs (your candles) in every other diaper of your outside layer.
Step 9:
Make a napkin flower and place it on top, right in the middle.
Step 10:
Place your base underneath the pampers cake. I have used a round aluminium grill tray and have covered it with a paper lace doily. You can also use a normal tray or use some cardboard and cover it with aluminium foil.

Here you go - isn't it beautiful?
And wasn't it really easy?
More Ideas For Your One Tier Nappy Cake:
The colorful mouse diaper cake on the left has the same base, but I have fixed a cuddly mouse from Sigikid on top. To keep the mouse in place I have used baby spoons and some ribbon.
The little monster diapercake on the right shows more variations on how to decorate the top of your diaper-cake. This nappy cake features a musical monster toy, a pacifier, a pair of socks folded like flower blossoms and a cotton bib, also folded like a flower. The musical toy is fixed with two plastic spoons - one on top and one at the end. I have simply stuck the spoons between the diapers with the top sticking out and have then used some ribbon to tie the toy to the spoons. Stays dead certain in place!

Showcase your homemade diaper-cake
Here you find instructions for a bigger - 3 tier nappy cake .
Return from Diapercake to Best Baby Gifts Homepage
Some links on this page marked #ad or (ad) are affiliate links. This means when you purchase a product through one of these links I earn a small commission. There is no extra cost to you. This money helps me to maintain this website and provide free information for you. Thank you for supporting my website. To learn more please see my affiliate disclosure document.
Amazon and the Amazon logo are trademarks of Amazon.com, Inc. or its affiliates.