Diaper Cake Directions
- make a plain diaper cake -
These step by step diaper cake directions show you how to make an easy diaper cake with diapers only - there are no baby accessories required! With my free diaper cake instructions you will come up with a basic, yet beautiful diaper cake in no time!
If you want to make a decorated cake, please follow the link below to see how to attach all kinds of baby things and beautiful decorations to your plain cake.
Tell us your diaper cake story and post your photos.
Showcase Your Homemade Diaper Cake At Our Diaper Cake Gallery!
What You Need:
 |
 |
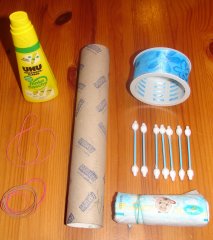
For a basic 3 tier diaper cake you will need:
- approx. 75 diapers size 2 (or approx. 70 diapers in size 3). I have used Pampers in size 2, you can also mix size 2 and 3, if so use size 3 for the lower tier(s)! It is better not to use size 1 diapers because newborns grow so quickly and the baby might outgrow size 1 before all diapers have been used up.
- a tube (inner of a kitchen towel roll): alternatively a big bottle of baby bath or baby shampoo or also a baby drinking bottle.
- approx. 50 rubber bands: 46 small and 4 big ones.
- broad gift ribbon: choose the color according to your general theme. For a boy blue and green, for a girl pink and rose and also red and for unisex yellow, orange and brown are suitable.
- a tray and a paper lace dolly or a napkin: alternatively a piece of big cardboard and aluminium foil to cover the cardboard with
- approx. 25 baby cotton swaps, some string, a pair of scissors, glue and 3 small cloth pegs
Ready To Start With The Diaper Cake Directions:
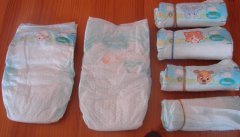
Step 1:
Roll all your diapers for tier 1. I have rolled these from the closed end to the open end which let's you see the design and makes a very colorful diaper cake. As the diapers are mainly blue and green this suits the boy theme very well. For a girl cake it would have been better to roll them from the open end to the closed end.
Roll the diapers as tightly as you possibly can and then fix with a rubber band at the top third.
Step 2:
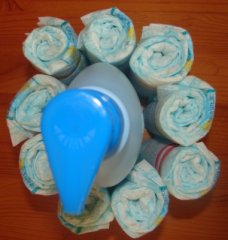
Take your tube (bottle) and have it stand upright with one of the big rubber bands loosely around. Position your rolled up diapers around the tube, and inside the rubber band. For your first layer there should be around 9 diapers round the tube but do not take these numbers for granted. It all depends on how voluminous your diapers are.
 |
 |

Diaper Cake Directions - Step 3:
Take another big rubber band and fix it loosely around the 9 diapers, add your 2nd layer which would be about 15 diapers.
Step 4:
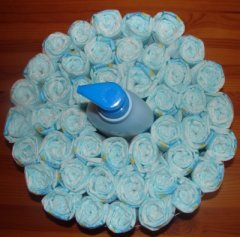
With the help of another big rubber band position your layer 3 which will be approx. 20 diapers. Make sure the diaper openings all point towards the inner of the diaper cake and the motifs point to the outside. That makes your cake look the best.
Diaper Cake Directions - Step 5:
Use some string to fix all the layers around the tube. Pull tight and make a knot! After that you can remove all of your rubber bands.
Now your 1st tier is finished!
Step 6:
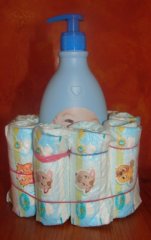
Proceed in tier 2 as follows: for layer 1 of tier 2 position approx. 9 diapers around the tube (bottle) and for layer 2 approx. 14 diapers; then fix with some string and remove the rubber bands.
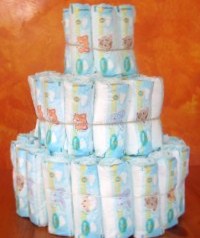
Diaper Cake Directions - Step 7:
Your core (tube, bottle) should still stick out a few inches, continue with tier 3 just as in tier 2, you will need approx. 7 diapers. Then again fix with string and remove all of your rubber bands.
 |
 |
Diaper Cake Directions - Step 8:
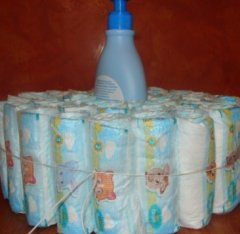
Take your ribbon, position it over the string of all 3 tiers and fasten it with just a drop of glue. Take a small cloth peg to fix the ends until the glue has dried. Alternatively just tie a knot and make a nice bow. Or place some decoration such as a plastic flower or an extra bow on it.
Take another diaper, roll it up and wrap some ribbon around the top. Then place the diaper on the core tube so it still sticks out a little bit (see the photo of the finished cake below).
Step 9:
Correct any crooked and incorrect diapers and position all in a nice and straight way to make the cake look perfect.
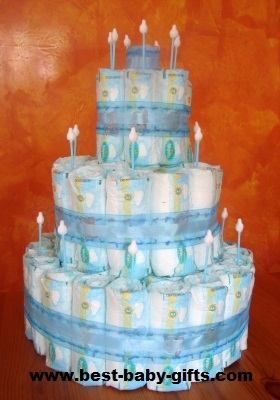
Diaper Cake Directions - Step 10:
Use some cotton swabs as candles and stick them inside the rolled diapers. On tier 3 use one for each diaper, on tier 1 and 2 stick one in any other diaper only. Of course, you can take real birthday candles, too - however, I would not light them up, to prevent the cake and diapers from burning down completely!
Step 11:
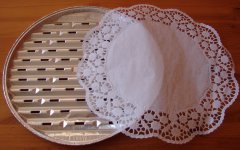
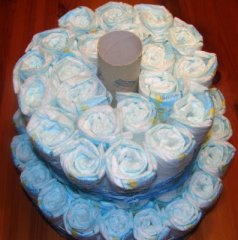
Now, all that's still needed is a base to put the diaper cake on. I have used a round aluminium grill tray and have covered it with a paper lace doily (see photo on top). You can also use a napkin to cover it. Alternatively, take a normal tray or cut a round shape out of some thick cardboard and cover it with aluminium foil. Of course, you can also take a real cake plate.
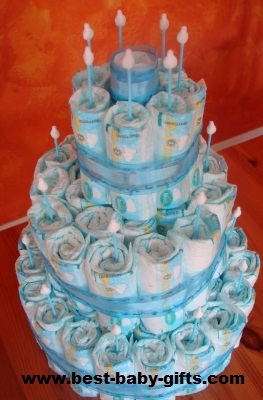
TA-DA! Here it is: our basic, simple diaper cake -
easy as taking candy from a baby!!!
TIPS:
Roll your diapers and leave them for the night before your start to make your actual cake.
Roll your diapers and prepare your plain cake but leave the rubber bands on. Let the diaper cake sit overnight and remove the rubber bands the next day. Only then do your decoration.
By doing so the diapers will stay better in shape and will just look nicer!
If you have any questions regarding my diaper cake tutorial please do not hesitate to contact me and ask. I have made more than 1200 diaper cakes (for sale) and should know an answer to most of your questions!
A pampers cake can be given on its own but also to accompany a gift that does not look 'fancy enough' by itself, such as for example a gift envelope, a babysitting coupon or a money gift.
No time? Not convinced you can do it?
Shop for #ad beautiful diaper cakes
If you are looking for other homemade baby gifts, here are more beautiful and homemade baby gift ideas.
Decorating your diaper cake: want to pimp up your cake? Look for unique diaper cake decorating ideas here!
Some links on this page marked #ad or (ad) are affiliate links. This means when you purchase a product through one of these links I earn a small commission. There is no extra cost to you. This money helps me to maintain this website and provide free information for you. Thank you for supporting my website. To learn more please see my affiliate disclosure document.
(#ad) best baby products